This innovative gardening solution can revolutionize the way you nurture your plants, ensuring they grow stronger and healthier, while also saving precious water resources. This introduction paves the way for a comprehensive discussion on creating your own Drip Hose System. The DIY approach doesn’t merely offer a cost-effective alternative; it also provides the freedom to customize the system based on individual garden requirements. The upcoming segments will reveal how this slow, deep watering technique can result in a thriving garden, even in the face of water scarcity. By venturing deeper into this discussion, one will understand the science behind slow, deep watering. It’s not just about water conservation, but also about facilitating better nutrient absorption by plants, promoting root growth, and minimizing water wastage. The following content will delve into the details of how a DIY Drip Hose System can achieve these objectives. In this crucial guide, the step-by-step process of setting up a DIY Drip Hose System will be explained meticulously. Each aspect, from gathering the necessary materials to fine-tuning the system for optimal performance, will be addressed in detail. The goal is to empower you with the knowledge and skills required to implement this sustainable gardening solution in your own backyard. So, let’s embark on this enriching journey towards efficient, eco-friendly gardening.

Understanding the Drip Hose System
The concept of the drip hose system is not a new one but it has been gaining increasing popularity due to its efficiency in resource utilization. In essence, a drip hose system is a method of irrigation where water is delivered to the root zone of plants, drop by drop, using a network of tubes, hoses, and emitters. The key advantage of this method is that it minimizes water wastage by delivering water directly to the plant roots, thus enabling them to grow stronger with less water. There are two main types of drip hose systems – above-ground and sub-surface. Above-ground systems have the hoses and emitters exposed, while sub-surface systems have them buried in the ground. Each has its own advantages and disadvantages and the choice between the two would depend on factors such as the type of plants, soil type, and climatic conditions.
The Efficiency of Drip Hose System
The drip hose system is a remarkably efficient irrigation method for a number of reasons. Firstly, by delivering water directly to the plant roots, it reduces water loss due to evaporation and runoff. This is particularly important in areas with water scarcity. Secondly, this system promotes healthier plant growth. Because the water is delivered slowly and directly to the root zone, it encourages deep root growth. This makes the plants more resilient and able to withstand periods of drought. Moreover, it reduces the chances of plant diseases and weed growth. Overwatering can lead to conditions that promote the growth of fungus and other plant diseases. On the other hand, when water is applied directly to the soil, there is less surface moisture, which discourages weed germination.
Designing Your Own Drip Hose System
Designing a drip hose system might seem complex, but with a little knowledge and planning, it can be a rewarding DIY project. Here are some steps to get you started:
Identify Your Needs
Before you begin, you need to assess your watering needs. This includes determining the types of plants you have, their water requirements, and the size and layout of your garden. Different plants have different water needs, and this will affect the placement and flow rate of the emitters.
Choose Your Materials
There are several components required for a drip hose system, including a water source, a backflow preventer, a filter, a pressure regulator, tubing, emitters, and connectors. It is essential to choose high-quality materials that can withstand external factors such as weather and UV radiation.
Installing Your Drip Hose System
Once your main tubing is laid out along the garden beds, the next step is to install the emitters—the components responsible for delivering water directly to the plant roots. Emitters come in a variety of flow rates, such as 1 GPH (gallon per hour), 2 GPH, or adjustable options, allowing you to tailor water delivery to the specific needs of each plant.
For water-thirsty crops like tomatoes or fruit trees, you may install multiple emitters or opt for a higher flow rate. Conversely, for succulents, herbs, or native plants with low water needs, a single, low-output emitter is sufficient. Spacing and placement are also critical: ensure each emitter is positioned close to the root zone, ideally 1 to 2 inches from the plant’s base. For rows of closely spaced plants, soaker hoses or inline drip tubing with pre-spaced emitters may be more efficient.
To insert emitters into the tubing, use a hole punch tool for precision and a tight fit. After installation, test each emitter to confirm even and consistent water flow.
Lay Out Your Tubing
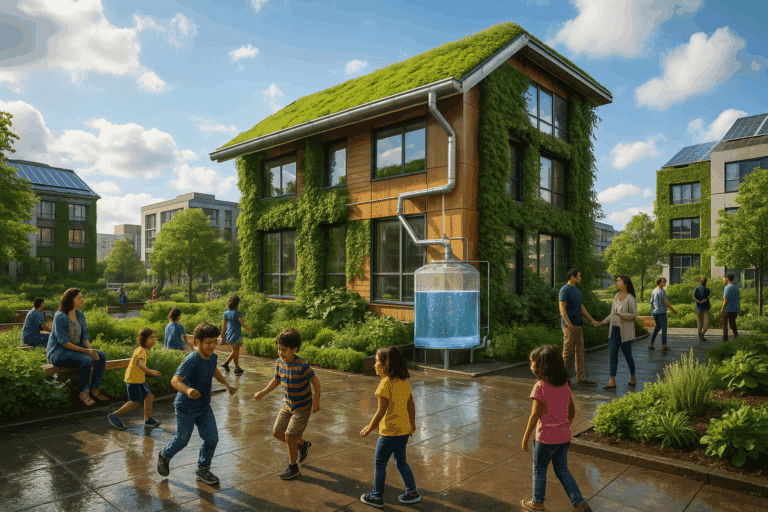
The final step is to connect your system to a reliable water source, such as an outdoor faucet, rainwater harvesting barrel, or well system. Regardless of the source, proper connection accessories are essential for functionality and safety:
- Backflow Preventer: This device ensures that water from the irrigation system does not siphon back into your home’s potable water supply, which is especially important for systems connected to municipal lines.
- Filter: A filter (typically a screen or disc filter) should be installed immediately after the water source to capture debris, sediment, or mineral buildup that could clog emitters and reduce performance.
- Pressure Regulator: Drip systems operate best at low pressure (usually between 15–30 PSI). A pressure regulator maintains optimal flow and prevents tubing blowouts or irregular watering due to high pressure.
Once connected, turn on the system and perform a visual inspection to confirm that emitters are functioning and that there are no leaks or blockages.
Install the Emitters
The final step is to connect your system to a reliable water source, such as an outdoor faucet, rainwater harvesting barrel, or well system. Regardless of the source, proper connection accessories are essential for functionality and safety:
- Backflow Preventer: This device ensures that water from the irrigation system does not siphon back into your home’s potable water supply, which is especially important for systems connected to municipal lines.
- Filter: A filter (typically a screen or disc filter) should be installed immediately after the water source to capture debris, sediment, or mineral buildup that could clog emitters and reduce performance.
- Pressure Regulator: Drip systems operate best at low pressure (usually between 15–30 PSI). A pressure regulator maintains optimal flow and prevents tubing blowouts or irregular watering due to high pressure.
Once connected, turn on the system and perform a visual inspection to confirm that emitters are functioning and that there are no leaks or blockages.
Connect to Water Source
Finally, connect the system to your water source. This could be a tap, a rainwater collection system, or a well. Ensure that there is a backflow preventer to prevent contaminated water from flowing back into your clean water supply. You should also install a filter to remove any debris that could clog the emitters, and a pressure regulator to control the water pressure.
Maintaining Your Drip Hose System
Maintenance is key to ensure the longevity and efficiency of your drip hose system. Regular checks and cleaning of the emitters are necessary to prevent clogging. Additionally, checking the system for leaks will ensure that water is not wasted.
System Monitoring
Beyond cleaning and physical inspections, long-term success with drip irrigation requires active monitoring. Track how well your plants are responding—signs of overwatering (yellowing leaves, soggy soil) or underwatering (wilting, dry patches) may indicate that adjustments in emitter flow or placement are needed.
If your system includes a timer or automation controller, review your watering schedule seasonally to reflect changes in temperature, precipitation, and plant growth cycles. During rainy periods, consider turning off the system temporarily to prevent oversaturation.
By combining smart installation with ongoing monitoring and maintenance, your DIY drip hose system will remain a reliable, efficient, and sustainable watering solution for years to come.
Seasonal Adjustments
One of the most important aspects of maintaining an efficient drip hose irrigation system is recognizing that plants’ water needs vary with the seasons. Factors such as temperature, humidity, rainfall, and daylight hours influence how much water your garden actually requires. Making seasonal adjustments ensures that you avoid both underwatering and overwatering—both of which can negatively impact plant health and soil structure.
During hot summer months, evaporation rates are much higher, and plants—especially those producing flowers, fruits, or vegetables—tend to consume more water. In this case, you may need to increase the watering frequency or slightly lengthen the duration of each watering session. Monitoring your soil moisture regularly will help you fine-tune these changes.
In contrast, during cooler seasons like autumn and spring, the need for water decreases. Rainfall may supplement irrigation, and cooler temperatures slow down transpiration in plants. During these periods, it’s wise to reduce the flow rate of emitters or shorten watering sessions to conserve water and prevent waterlogging.
Some advanced drip systems come with automatic controllers or weather-based sensors that adjust watering based on environmental data. However, even a basic DIY drip hose system can be easily adjusted manually as long as you’re attentive to seasonal shifts and plant cues.
System Winterization
If you live in a region where temperatures fall below freezing, winterizing your drip system is essential to prevent damage. Water left inside hoses, emitters, or connectors can freeze, expand, and cause cracking, bursting, or separation of components.
To winterize your system:
- Shut off the water supply to the drip line.
- Drain all remaining water by opening the end caps and lifting low points of the hose to encourage full drainage.
- Disconnect above-ground components such as hose splitters, timers, or pressure regulators, and store them indoors.
- Cover any exposed hose sections with insulation or protective caps to shield them from snow, ice, and UV damage.
Come spring, a properly winterized system can be reassembled and reactivated with minimal effort and expense, ensuring seasonal longevity and consistent performance year after year.
Long-Term Benefits of a DIY Drip Hose System

Despite requiring some initial effort to design and install, a DIY drip hose system offers significant long-term advantages. It delivers water directly to the base of plants, minimizing waste due to evaporation and runoff, and it reduces the occurrence of foliar diseases by keeping leaves dry.
Moreover, drip irrigation promotes deeper root growth, making plants more resilient to drought and environmental stress. By targeting water application, you also discourage weed growth between rows, since non-planted areas stay dry.
In summary, with proper seasonal management and winter care, a DIY drip hose system becomes a low-maintenance, high-efficiency solution for sustainable gardening. It helps you conserve water, save time, and maintain a healthy, thriving garden year-round.
Conclusion
In conclusion, the DIY drip hose system for slow, deep watering has emerged as a sustainable, efficient, and economical method for gardening. By providing a slow and steady supply of water directly to the roots, the system helps plants grow stronger while conserving water, a precious resource. Furthermore, this system not only saves time and energy but also ensures the plants get the precise amount of water they need to thrive, reducing waste and promoting growth. Moreover, the DIY approach allows gardeners to customize the system to their garden’s specific needs, enhancing its effectiveness. It proves to be a practical solution in areas affected by water scarcity or drought, and even for the busy urban gardener. In essence, the drip hose system is more than just an irrigation method; it’s a testament to human ingenuity and our ability to adapt and thrive, even in less than ideal circumstances. By implementing this DIY drip hose system, we can take a step towards a greener and more sustainable future. This easy-to-install system is a clear illustration of how innovative, eco-friendly practices can lead to prosperous growth in our gardens, and by extension, our lives.


